Showing posts with label Adobe. Show all posts

October 31, 2012

Hanging Quotes in InDesign

Hanging quotes and hanging punctuation in InDesign are very easy to create, adjust, and undo. Lets say that you have a section of text that contains quotation marks. The quotation marks should hang to the left on the body of copy. All of the other characters are aligned left. The glyph is the only thing that extends into the margin. Here's how to accomplish this:

1) Create a text box that contains a quotation mark at the beginning.


2) With the text box selected, go to Type > Story.

3) In the Story pallet, click the check box next to "Optical Margin Alignment"

4) With the box checked, the quotation marks hang into the left margin. 


Optical Margin Alignment is also useful when dealing with fully justified text. Take note of the positioning of the quotation marks and the hyphens in the following two images.

A justified text box will look like this:


 With optical margin alignment, it will look like this:


October 16, 2012

Combining Disconnected Text in Illustrator

Opening PDFs in Illustrator may cause some elements to behave strangely. Text boxes in particular are often affected. Type will many times break into smaller text boxes, with words or individual letters in their own box. This can be very impractical and annoying if you're trying to make edits to the document.

Below is an example of a PDF that I opened in Illustrator. On the baseline, the tiny blue squares indicate the start of a new text box. In this example the text is broken at at least once per word.


Notice how you can select an individual character or sets of characters and drag them around. Not cool.


If you want to edit the type, you must first combine all of the characters or retype them all. Here's an easy solution for getting all of those individual letters grouped together.

1. With your selection tool, select all of the characters that you want to combine. Clicking and dragging your cursor over all of the text boxes is an effective way to select all of the characters and words.


Copy them all (Command + C) or Control + C if you're on a PC.
     

2. With your type tool, draw a text box


3. With the text box still selected with the type tool, press Apple + V (Control + V)

     
4. The type will flow itself into this new text box, without all of the awkward breaks.


Helpful Hint: If you're flowing a LOT of copy, it may not always copy in the correct order. If there are paragraph breaks, try to select one paragraph at a time to copy and paste.

Another Helpful Hint: For illustration purposes only, I have the bounding boxes showing in steps 2 and 3 and hidden in all other examples. If your screen doesn't look exactly like mine, it may be due to the display of the bounding boxes. To toggle this view go to: View > Show Bounding Box or View > Hide Bounding Box

April 13, 2011

Adobe Acrobat Selected Form Field Color

In Adobe Acrobat there are two coloring options in the fields:


• The background of the field.(default is blue-grey)

• The color of the field while the user is entering information. (default is transparent)


This post covers the second option. If you're interested in eliminating the blue-gray background in all fields, visit this post.


Here's the PDF with form fields added.


When I select the first field, the grey coloring disappears.


1) To change the color while editing, go to Edit >

Add or Edit Fields


2) In this example I'm going to change the color for the "Name" field.

Right click on your field and select "Properties..."


3) Click on the "Appearance Tab"

Then click on "Fill Color"

I chose orange.


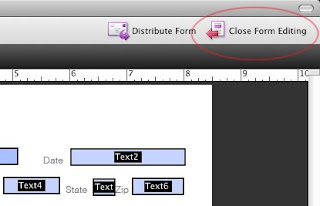
4) Back in the document close the form editing by clicking on the icon in the top-right corner.


Now when my cursor is in the "Name" field, it turns orange. When I tab out, or the field is no longer active, it will go back to the grey.

Adobe Acrobat Form Field Highlight Color

I recently made a form in Acrobat, but didn't want the fields to be highlighted with the blue-gray color that is the default. It took me some time to find the option that I wanted.

In Acrobat you are able to control two coloring options in the fields:

• The background of the field. (default is blue-grey)
• The field while the user is entering information. (default is transparent)

This post covers how to change the first option - to change it from the blue-grey. If you're looking for information on field color when it's active (onfocus) then check out this post.

Here's my PDF after adding the fields in Acrobat Pro:

1) To eliminate these boxes go to Acrobat > Preferences


2) Along the left-hand side go to "Forms"
You will see two colored boxes on the right. These control the color of the fields. I have them circled in the image. You may also want to uncheck the box that says "Show border hover color for fields"


Now my PDF looks like this:
*Please not that this changes how the forms look on your computer only. If you change the color on your machine, it will still look blue-grey on another machine with the default settings. In the same way, you may leave the color set to default, but on another person's machine, they may have their color set to magenta. The fields will show up as bright pink on that computer.

July 12, 2010

Knife Tool In Illustrator

The Knife tool in Illustrator can be used to cut a shape into smaller segments. The tool can be used to cut straight lines, or make more freehand cuts.

The Knife tool is located in a different place depending on which version of Illustrator you have. Below, I have shown where the knife tool is located in CS2, CS3, CS4, & CS5.

CS2 CS3 CS4 CS5


I'm going to go over how to do 3 things with this tool:
I) Make a freehand cut
II) Make a straight line cut
III) Make a straight line cut on 90º angles

For all of these steps we're going to need to create a shape. In this example, I'm using a green box with a pink stroke.
I'm going to select the box, and then select my knife tool.
+


I) Making a freehand Cut
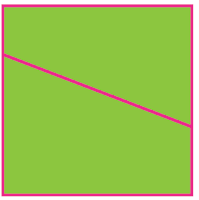
Click and drag your knife tool over your shape.
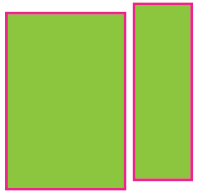
Notice that you will now have two segments. In my example this is evident by the pink outline, around my newly created 2 shapes. You can now use your selection tool(the normal arrow) and move the pieces around.


II) Make a straight line cut
Hold down the Option keyand click and drag your knife tool over the shape. Notice that the line you are drawing is straight. No matter how wobbly your hand is, your line will be straightened. If you are a Windows user, press the Alt key instead of Option.

+


III) Make a straight line cut on 90º angles
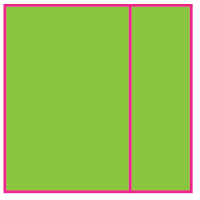
Hold down Option + Shift and click and drag your knife tool over the shape.

If your line is close to vertical, then it will snap to a perfectly vertical line. If it is close to 45º then it will snap to that angle. In my example the line I drew was closeto vertical, and I ended up with a perfectly vertical line! If you are a Windows user, press the Alt key instead of Option.
+ +


Note:
Above, I stated that you must first select your shape. You do not have yourobjects selected for the knife tool to work. Simply dragging the knife tool over an object, selected or not, it will break that object into segments.

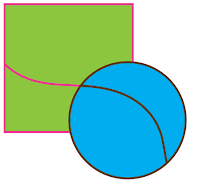
If you have 2 objects overlapping, or close to each other, the knife tool behaves differently.
With both objects selected, and you use the knife tool, they will both be cut as seen below.

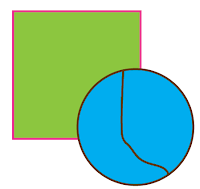
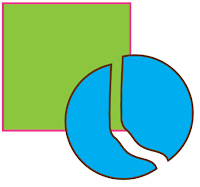
In this example, I selected only the blue circle. When I drag the knife tool over the shapes, only the blue circle is affected.