Showing posts with label CS5. Show all posts

October 31, 2012

Hanging Quotes in InDesign

Hanging quotes and hanging punctuation in InDesign are very easy to create, adjust, and undo. Lets say that you have a section of text that contains quotation marks. The quotation marks should hang to the left on the body of copy. All of the other characters are aligned left. The glyph is the only thing that extends into the margin. Here's how to accomplish this:

1) Create a text box that contains a quotation mark at the beginning.


2) With the text box selected, go to Type > Story.

3) In the Story pallet, click the check box next to "Optical Margin Alignment"

4) With the box checked, the quotation marks hang into the left margin. 


Optical Margin Alignment is also useful when dealing with fully justified text. Take note of the positioning of the quotation marks and the hyphens in the following two images.

A justified text box will look like this:


 With optical margin alignment, it will look like this:


October 16, 2012

Combining Disconnected Text in Illustrator

Opening PDFs in Illustrator may cause some elements to behave strangely. Text boxes in particular are often affected. Type will many times break into smaller text boxes, with words or individual letters in their own box. This can be very impractical and annoying if you're trying to make edits to the document.

Below is an example of a PDF that I opened in Illustrator. On the baseline, the tiny blue squares indicate the start of a new text box. In this example the text is broken at at least once per word.


Notice how you can select an individual character or sets of characters and drag them around. Not cool.


If you want to edit the type, you must first combine all of the characters or retype them all. Here's an easy solution for getting all of those individual letters grouped together.

1. With your selection tool, select all of the characters that you want to combine. Clicking and dragging your cursor over all of the text boxes is an effective way to select all of the characters and words.


Copy them all (Command + C) or Control + C if you're on a PC.
     

2. With your type tool, draw a text box


3. With the text box still selected with the type tool, press Apple + V (Control + V)

     
4. The type will flow itself into this new text box, without all of the awkward breaks.


Helpful Hint: If you're flowing a LOT of copy, it may not always copy in the correct order. If there are paragraph breaks, try to select one paragraph at a time to copy and paste.

Another Helpful Hint: For illustration purposes only, I have the bounding boxes showing in steps 2 and 3 and hidden in all other examples. If your screen doesn't look exactly like mine, it may be due to the display of the bounding boxes. To toggle this view go to: View > Show Bounding Box or View > Hide Bounding Box

December 31, 2011

Placing a multiple page PDF, or multiple artboard Illustrator file into InDesign

You can place many types of objects into InDesign including Adobe Illustrator files and pdfs. I've always struggled with placing pdfs with multiple pages, or Illustrator files with multiple artboards. In the past if I wanted to import other than the first page of a pdf, I'd save just that page by itself, then place that file in InDesign. This is a very inefficient way to manage files. I recently discovered a way to import other pages or artboards into InDesign.

1) In InDesign go to File > Place


2) In the pop-up dialogue box you will see three options at the bottom. (In CS4 there are only two check boxes)
CS5

CS4


Check the box that says "Show Import Options"

3) In the window, find and select your PDF or Ai file you want to import. Click "Open"

4) In this second pop-up window you will see import options for the file. Select a single page/ artboard or a range. Then click "OK"


Note: InDesign will remember that you checked the "Show Import Options" the next time you go to place a file. You will see this screen each time until you uncheck the box.

September 30, 2011

Unlink Text Threads in Indesign

In Indesign you can flow text from one text box to another which allows the story to dynamically move as you add or remove text. If you decide that you don't want the text boxes to be linked, here is how to unlink the text boxes, or unflow the text.

1) Select at least one of the text boxes that contains flowing text.

2) Go to Window > Utilities > Scripts

3) In the Scripts panel navigate to Application > Samples > JavaScript > SplitStory.jsx
Double-click on the "SplitStory.jsx" text.

4) Your text will now live within its current box. It will not flow from one to the other.

August 2, 2011

Bridge Italicized Keywords

Why are my keywords in Bridge italic? Why do my keywords disappear from Bridge? Aaah, keywords can be frustrating, but they don't need to be.

In Bridge some keywords are temporary, appearing when you view an image that is tagged with that keyword and disappearing when you restart Bridge. These are keywords that were added by other users. If you do not have the same keywords saved to Bridge, then they will appear in italic, indicating that they are temporary.

Ok, here's an example.
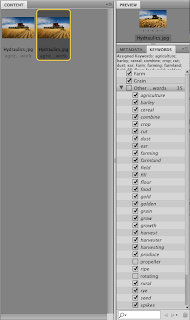
In Bridge I have selected a photo of some farming equipment (I believe it is a combine).
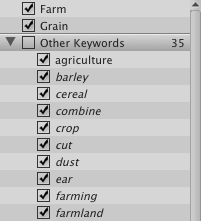
Notice in my keywords pallet there are many keywords that are checked. The two words at the top. "Farm" and "Grain" are in normal type. The keywords under the category "Other Keywords" are italic. The italicized words are not part of the permanent keyword collection. They appear when you select an image that has been tagged with those keywords. They will remain (in italic) in my keywords panel until you close bridge.


If you want the keywords to display all the time in Bridge, then you must make them permanent. Here's how.

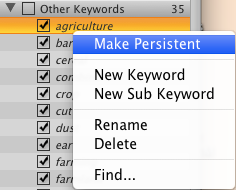
1) Right click the keyword. (It does not have to have a checkmark in front of it). Choose "Make Persistent"

2) Now the keyword "Agriculture" is not italic. This means that if we close Bridge and reopen it, the keyword will still be there.

3) Close Bridge and reopen. Notice that "Agriculture" is still on the list, and all the other italic words are no longer there. That's because we made it persistent and it now permanently in our Bridge collection.


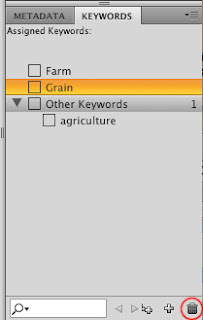
To remove a keyword, just select the keyword and then click on the trashcan icon in the bottom right-hand corner. The keyword will be removed from Bridge. If you then select an image that had previously been tagged with this keyword, it will appear in italic.


June 21, 2011

Importing a Library in Bridge

How do I import keywords into Bridge?
Importing keywords is very easy and it is beneficial in a group setting, like my office for example. We want everyone tagging images to have access to the same set of keywords. This reduces the number of mistakes due to hand-keying in terms. The library can be created and imported by following these easy steps listed below. They can also be found on Adobe's site here (scroll down a bit) or on This Site (better step-by-step instructions).

1) In a text editor such as Word or Pages, create a plain text document. This file type will have the ending .txt.
OR
You can also create a system of keywords in in Excel.
2) Add your keywords, with these restrictions:
• Place one keyword per line
• Create sub categories by indenting keywords
You can put your keywords in any order, but Bridge will automatically alphabetize them.
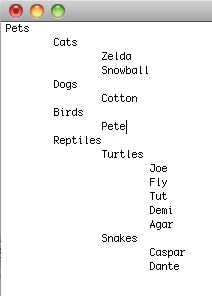
In my example I have a list of pets. Notice the order they are in.

3) In Bridge, go to your keywords panel and click on the small drop-down arrow in the top right-hand corner. Click on Import.

4) Find the document on your machine and then click "Open".

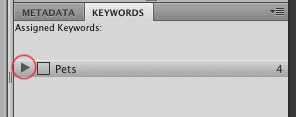
5) The keywords are now added to your list. In my pet example, I had "Pets" as the main category. You will see that's the only item in my new keyword list. I need to click the little arrow beside it to see the sub categories.

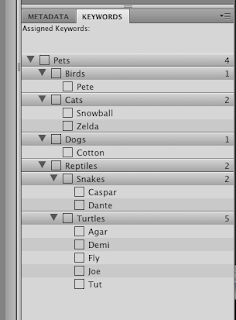
Notice in the expanded list below that the items are alphabetized. The category "Birds" comes first, etc.

Notes:
• When importing keywords, you will not overwrite the existing keywords that you already have in Bridge
• If you import a set of keywords, modify the text file and re-upload, it will only add new keywords. It will not overwrite, even if you're uploading the same-named text file.
• To Delete keywords you must drag the keyword to the trashcan icon within Bridge. Or select the keyword and click the trashcan icon.

March 14, 2011

Ignore Text Wrap InDesign

The Text Wrap feature is great for flowing text around an object. This is applied to the image, and all text that encounters the object will be forced to wrap. However if you want some text to overlay the image, or come within close proximity, it must be allowed to break that Text Wrap Frame.

Here's how:

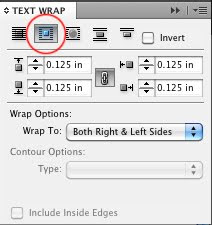
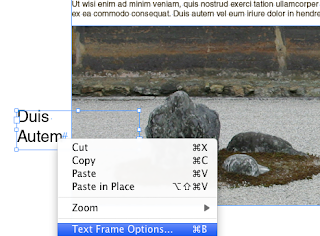
1) Create your text box and object and set your object to "Text Wrap". In this example I have it to wrap around the bounding box and to have a .125" offset the entire way around the object.


2) Select the text box that you want to ignore the Text Wrap. (In my example I want the words "Duis Autem" to appear overtop of the image.) Right click on the text and select "Text Frame Options"


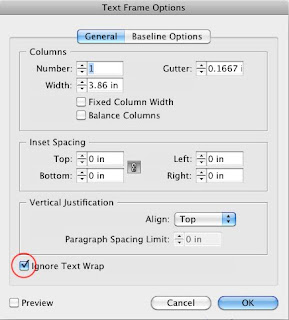
3) In the pop-up window, click on "Ignore Text Wrap", then click "OK"

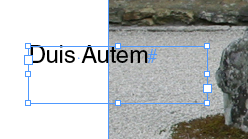
4) Now the text ignores the wrap.


December 17, 2010

InDesign Printing Pages Out of Order

I recently found one more small useful tool for printing in InDesign. It's not a major feature, and I don't think it is used that often. However, someday you may want to print your pages in a non-sequential order. It's very easy to do.

1) Make sure you have an InDesign document with multiple pages. Next, pull up the "Print" dialogue box from the File menu.


2) Click on the "Range" button. You can type in the pages you want to print. The order you key them in as, will be the order that they print. Notice that I will print page 3,1, pages 4 through 6, then page 2. You can include ranges (4-6) or individual pages (5,2,8) in your range field.