June 21, 2011

Importing a Library in Bridge

How do I import keywords into Bridge?
Importing keywords is very easy and it is beneficial in a group setting, like my office for example. We want everyone tagging images to have access to the same set of keywords. This reduces the number of mistakes due to hand-keying in terms. The library can be created and imported by following these easy steps listed below. They can also be found on Adobe's site here (scroll down a bit) or on This Site (better step-by-step instructions).

1) In a text editor such as Word or Pages, create a plain text document. This file type will have the ending .txt.
OR
You can also create a system of keywords in in Excel.
2) Add your keywords, with these restrictions:
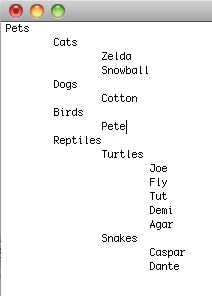
• Place one keyword per line
• Create sub categories by indenting keywords
You can put your keywords in any order, but Bridge will automatically alphabetize them.
In my example I have a list of pets. Notice the order they are in.

3) In Bridge, go to your keywords panel and click on the small drop-down arrow in the top right-hand corner. Click on Import.

4) Find the document on your machine and then click "Open".

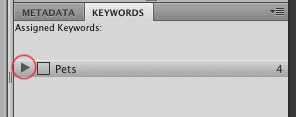
5) The keywords are now added to your list. In my pet example, I had "Pets" as the main category. You will see that's the only item in my new keyword list. I need to click the little arrow beside it to see the sub categories.

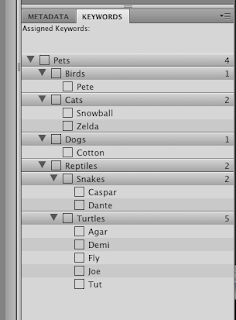
Notice in the expanded list below that the items are alphabetized. The category "Birds" comes first, etc.

Notes:
• When importing keywords, you will not overwrite the existing keywords that you already have in Bridge
• If you import a set of keywords, modify the text file and re-upload, it will only add new keywords. It will not overwrite, even if you're uploading the same-named text file.
• To Delete keywords you must drag the keyword to the trashcan icon within Bridge. Or select the keyword and click the trashcan icon.

April 13, 2011

Adobe Acrobat Selected Form Field Color

In Adobe Acrobat there are two coloring options in the fields:


• The background of the field.(default is blue-grey)

• The color of the field while the user is entering information. (default is transparent)


This post covers the second option. If you're interested in eliminating the blue-gray background in all fields, visit this post.


Here's the PDF with form fields added.


When I select the first field, the grey coloring disappears.


1) To change the color while editing, go to Edit >

Add or Edit Fields


2) In this example I'm going to change the color for the "Name" field.

Right click on your field and select "Properties..."


3) Click on the "Appearance Tab"

Then click on "Fill Color"

I chose orange.


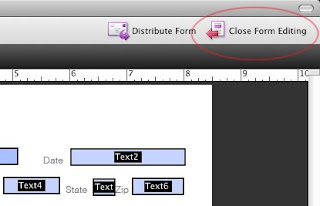
4) Back in the document close the form editing by clicking on the icon in the top-right corner.


Now when my cursor is in the "Name" field, it turns orange. When I tab out, or the field is no longer active, it will go back to the grey.

Adobe Acrobat Form Field Highlight Color

I recently made a form in Acrobat, but didn't want the fields to be highlighted with the blue-gray color that is the default. It took me some time to find the option that I wanted.

In Acrobat you are able to control two coloring options in the fields:

• The background of the field. (default is blue-grey)
• The field while the user is entering information. (default is transparent)

This post covers how to change the first option - to change it from the blue-grey. If you're looking for information on field color when it's active (onfocus) then check out this post.

Here's my PDF after adding the fields in Acrobat Pro:

1) To eliminate these boxes go to Acrobat > Preferences


2) Along the left-hand side go to "Forms"
You will see two colored boxes on the right. These control the color of the fields. I have them circled in the image. You may also want to uncheck the box that says "Show border hover color for fields"


Now my PDF looks like this:
*Please not that this changes how the forms look on your computer only. If you change the color on your machine, it will still look blue-grey on another machine with the default settings. In the same way, you may leave the color set to default, but on another person's machine, they may have their color set to magenta. The fields will show up as bright pink on that computer.

March 24, 2011

Undo Firefox Update

I recently updated Firefox to 4.0 and much to my dismay, I couldn't use the browser after the update. I received a little pop-up warning telling me that I can't use this application with my current OS. I'm on a Mac running Tiger. The new update doesn't work a machine that's this old.
To revert Firefox to it's original state, I just needed to find a previous version of Firefox and install it. Firefox's website provides a nice little walk-through to find previous versions of Firefox. ANY version of Firefox, and in any language, for any platform.

Once you read the instructions, visit their FTP site to download the version that you want.

March 14, 2011

Ignore Text Wrap InDesign

The Text Wrap feature is great for flowing text around an object. This is applied to the image, and all text that encounters the object will be forced to wrap. However if you want some text to overlay the image, or come within close proximity, it must be allowed to break that Text Wrap Frame.

Here's how:

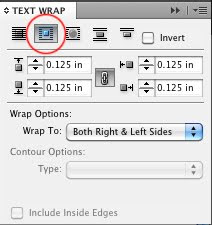
1) Create your text box and object and set your object to "Text Wrap". In this example I have it to wrap around the bounding box and to have a .125" offset the entire way around the object.


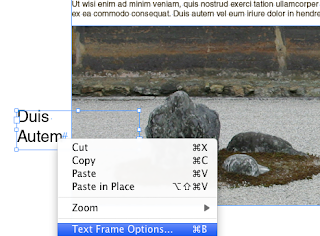
2) Select the text box that you want to ignore the Text Wrap. (In my example I want the words "Duis Autem" to appear overtop of the image.) Right click on the text and select "Text Frame Options"


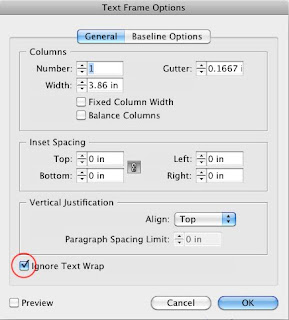
3) In the pop-up window, click on "Ignore Text Wrap", then click "OK"

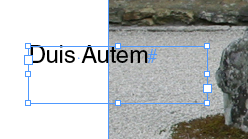
4) Now the text ignores the wrap.