While waiting for files to upload, I've fallen in love with the WeTransfer monsters.
May 4, 2016
April 27, 2016
October 31, 2012
Hanging Quotes in InDesign
Hanging quotes and hanging punctuation in InDesign are very easy to create, adjust, and undo. Lets say that you have a section of text that contains quotation marks. The quotation marks should hang to the left on the body of copy. All of the other characters are aligned left. The glyph is the only thing that extends into the margin. Here's how to accomplish this:
1) Create a text box that contains a quotation mark at the beginning.
2) With the text box selected, go to Type > Story.
3) In the Story pallet, click the check box next to "Optical Margin Alignment"
4) With the box checked, the quotation marks hang into the left margin.
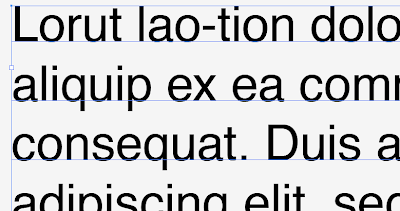
Optical Margin Alignment is also useful when dealing with fully justified text. Take note of the positioning of the quotation marks and the hyphens in the following two images.
A justified text box will look like this:
With optical margin alignment, it will look like this:
October 22, 2012
Urbane Reclamation Furniture Restoration
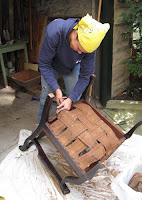
This past week I was fortunate to be able to visit Urbane Reclamation, an upcycled furniture business in Pittsburgh's East End. The owner and founder, Emily Bush gave me a tour of her shop showed me her showcase of finished projects. All of her pieces have been gently used and need just a little TLC to get them looking spiffy again. While visiting, she even let me have a hand at refinishing a chair! Here's how the process works:
Emily picks out pieces of furniture based off of their current condition, aesthetic value, and time period. She has a lot of Victorian-style pieces. This is a typical style found in the area. The East End has many Victorian homes, and estate sales are very frequent.
She had several chairs waiting to be refinished so we chose a straight-back chair with a cushioned seat. We started by popping off the upholstery tacks from the seat. Under the cushion cover we discovered another layer of fabric, and another, and another! This chair had four layers of different fabric on it. It's previous owner must have remodeled a lot, or been very indecisive. Needless to say, we had to remove four sets of tacks, staples, nails and screws! It took us about an hour and a half to remove all the metal bits.
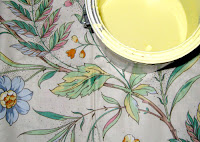
 Once the chair was stripped of all the hardware, fabric, springs, and support, we sanded with coarse sand paper. Emily explained that the coarse sanding would help the primer adhere to the wood. If this were going to be stained, we would go over it again with a finer grain sand paper to smooth out the texture. Since we were going to paint, we just needed to do a rough scrubbing. After we abraded the surface, we wiped it down with a damp cloth. This was followed with a layer of primer.
 Over the next day or two Emily will fill in the nail holes, smooth out the rough edges and apply the final layer of primer. A layer or two of paint will follow, and be finished off with a matching cushion. Check back in soon for the finished piece!
Emily picks out pieces of furniture based off of their current condition, aesthetic value, and time period. She has a lot of Victorian-style pieces. This is a typical style found in the area. The East End has many Victorian homes, and estate sales are very frequent.
She had several chairs waiting to be refinished so we chose a straight-back chair with a cushioned seat. We started by popping off the upholstery tacks from the seat. Under the cushion cover we discovered another layer of fabric, and another, and another! This chair had four layers of different fabric on it. It's previous owner must have remodeled a lot, or been very indecisive. Needless to say, we had to remove four sets of tacks, staples, nails and screws! It took us about an hour and a half to remove all the metal bits.
 Once the chair was stripped of all the hardware, fabric, springs, and support, we sanded with coarse sand paper. Emily explained that the coarse sanding would help the primer adhere to the wood. If this were going to be stained, we would go over it again with a finer grain sand paper to smooth out the texture. Since we were going to paint, we just needed to do a rough scrubbing. After we abraded the surface, we wiped it down with a damp cloth. This was followed with a layer of primer.
  Over the next day or two Emily will fill in the nail holes, smooth out the rough edges and apply the final layer of primer. A layer or two of paint will follow, and be finished off with a matching cushion. Check back in soon for the finished piece!
October 16, 2012
Combining Disconnected Text in Illustrator
Opening PDFs in Illustrator may cause some elements to behave strangely. Text boxes in particular are often affected. Type will many times break into smaller text boxes, with words or individual letters in their own box. This can be very impractical and annoying if you're trying to make edits to the document.
Below is an example of a PDF that I opened in Illustrator. On the baseline, the tiny blue squares indicate the start of a new text box. In this example the text is broken at at least once per word.

Notice how you can select an individual character or sets of characters and drag them around. Not cool.

If you want to edit the type, you must first combine all of the characters or retype them all. Here's an easy solution for getting all of those individual letters grouped together.
1. With your selection tool, select all of the characters that you want to combine. Clicking and dragging your cursor over all of the text boxes is an effective way to select all of the characters and words.


Copy them all (Command + C) or Control + C if you're on a PC.
2. With your type tool, draw a text box


3. With the text box still selected with the type tool, press Apple + V (Control + V)


4. The type will flow itself into this new text box, without all of the awkward breaks.

Helpful Hint: If you're flowing a LOT of copy, it may not always copy in the correct order. If there are paragraph breaks, try to select one paragraph at a time to copy and paste.
Another Helpful Hint: For illustration purposes only, I have the bounding boxes showing in steps 2 and 3 and hidden in all other examples. If your screen doesn't look exactly like mine, it may be due to the display of the bounding boxes. To toggle this view go to: View > Show Bounding Box or View > Hide Bounding Box
Below is an example of a PDF that I opened in Illustrator. On the baseline, the tiny blue squares indicate the start of a new text box. In this example the text is broken at at least once per word.

Notice how you can select an individual character or sets of characters and drag them around. Not cool.

If you want to edit the type, you must first combine all of the characters or retype them all. Here's an easy solution for getting all of those individual letters grouped together.
1. With your selection tool, select all of the characters that you want to combine. Clicking and dragging your cursor over all of the text boxes is an effective way to select all of the characters and words.

Copy them all (Command + C) or Control + C if you're on a PC.
2. With your type tool, draw a text box

3. With the text box still selected with the type tool, press Apple + V (Control + V)


4. The type will flow itself into this new text box, without all of the awkward breaks.

Helpful Hint: If you're flowing a LOT of copy, it may not always copy in the correct order. If there are paragraph breaks, try to select one paragraph at a time to copy and paste.
Another Helpful Hint: For illustration purposes only, I have the bounding boxes showing in steps 2 and 3 and hidden in all other examples. If your screen doesn't look exactly like mine, it may be due to the display of the bounding boxes. To toggle this view go to: View > Show Bounding Box or View > Hide Bounding Box
Subscribe to:
Comments (Atom)


