However, I will run through this tutorial, because it is a nice shortcut to create stylized photographs.
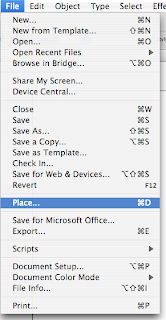
1) With Illustrator open, place a rastered object into Illustrator. A raster file will be most commonly a jpg, png, gif, bmp. As you can see in the screenshot, I've set mine to have a shortcut of Apple+D. Refer to This Article for how to set your own keyboard shortcuts.
2) Now you have an image in your Illustrator document. With your image selected, go to Object>Live Trace>Tracing Options.
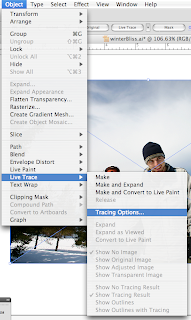
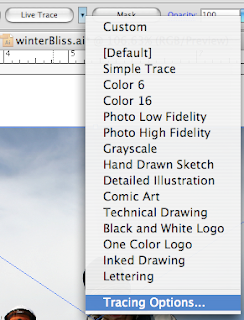
A shortcut for Live Trace can also be found on the Control Bar along the top of your screen. Click on the down arrow and then on "Tracing Options"
3) The pop-up box will give you many different options to choose from.
I like to arrange my screen so that I can see the image that I'm working on, as well as the entire pop-up box.
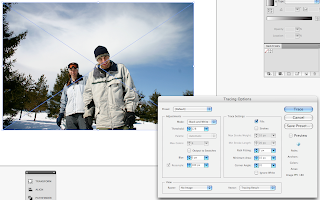
4) By adjusting the Tracing Options, you can achieve many different looks.
You can see what your final product will look like by clicking the Preview Button on the right side of the box. Be careful when you check this. If you have a complex image, or a slow(older) computer, it will take a while to render.
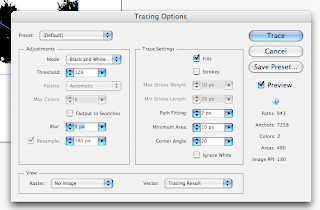
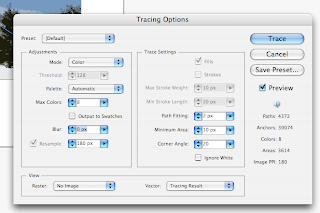
5) For this example, lets say I want a color image. I changed the "Mode:" to "Color" Then, I adjusted the "Max Colors". By adjusting this number, I found the correct value that gave me the result that I was looking for. Too many colors and it will look no different that the photograph. Too few colors and it will look like a bunch of blobs on the canvas. The value that I found to work best was "8". Then click the "Trace" button on the right-hand side.
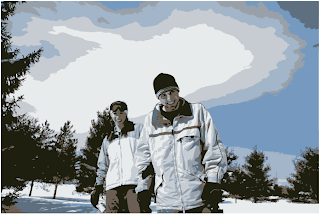
6) Now I have an image that is vectorized. But what can I do with it now? When the image is clicked, it remains as a group, and the individual segments and pieces are not selectable. If this is fine with you, then you're finished. If you want to break the new image into alterable segments, read on.
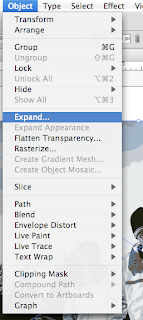
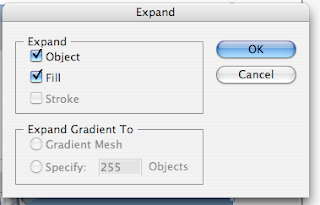
7) With the image selected, go to Object>Expand. In the pop-up box make sure the "Object" box is checked.
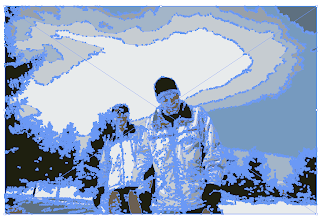
8) You can see all of the paths for each individual shape. It looks like a nightmare to make any adjustments. This isn't the cleanest way to make illustrations, but it will get you by in a pinch.

No comments:
Post a Comment