First, the "text box" can be smaller or larger than the table, and all of the content will still display correctly. However, if the cell size is too small to fit all the text in, then the text will be cut off.
Coming back to my main point: the "Tab" key within a table.
If you have a table and press the "Tab" key, then it brings you to the next cell. What if you want to create a tab WITHIN that cell?
Here's how:
Option+Tab
Here's the Tutorial:
Create a table in InDesign.
1) Type your information. Press the "Tab" key to separate your left column from the right.

2) Select the text.

3) Open the "Convert to Table" palette (Table>Convert Text to Table)
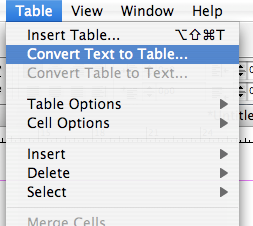
4) A pop up box will appear. It will contain the information for converting your text to a table.
The defaults will separate the columns by tabs, and the rows by paragraphs. This is what we want.
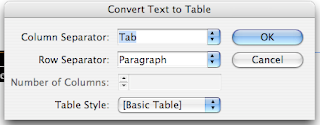
5) Press "OK". You now have a 2 row table with the days in separate columns.

6) Now I want to add ingredients to my menu, and I want them to be indented with the "Tab" key. I want to type in my pizza ingredients.
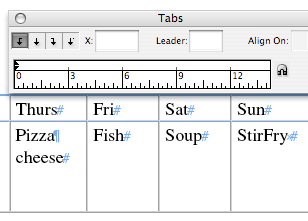
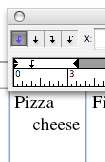
7) Set a tab
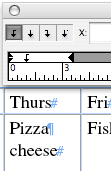
8) Press Option+Tab to indent the word cheese. If you press just "Tab", your cursor will move to the next box.

No comments:
Post a Comment